Guide for Beginners

Assigned to:Chopchop1614
Welcome to the guide for beginners to SS13 or Paradise station!
Congratulations on your employment by Nanotrasen! This guide will help you through starting your career. Space Station 13 is a multiplayer roleplaying game developed using the BYOND engine. In Space Station 13 (from here on to be referred to as SS13), players take the role/job of workers on board a space station. For a more advanced explanation of the lore please checkout the backstory on nanotrasen.
Please be aware that Paradise Station is a medium roleplaying server. Should you be new to roleplay, consult the roleplay guide. Should you still have questions, ask them on the forums at http://nanotrasen.se/phpbb3/
The Server Rules
Yes, there are rules but while you might think this is a bad thing, they help to create an enjoyable atmosphere for players and punish those who like to release the singularity onto the station every shift. They are actually quite relaxed, for example most things that are breaking space law will be handled by the stations security team. Please take a moment to read the rules it is also recommended that you read Space Law and Standard Operating Procedure
Joining the Server
Assuming you haven't already joined the server before, there are a few steps you will need to do:
- Download the BYOND client from [1]. You'll need it to run the game
- Register for a BYOND account here.
- Add this server to your bookmarks, or just manually using the BYOND client. byond://nanotrasen.se:6666
- OR select our name from the "Space Station 13" list of servers, we are usually at the top.
To manually connect to the BYOND server:
- using your client click "open" under the games category.
- Type in the IP of the server byond://nanotrasen.se:6666
- Click ok.
If it went well you should be connected, congratulations! You're on the server! Before you charge at the game is is recommended that you setup a character.
Character Setup
Cosmetics
Cosmetics have no actual effect on gameplay, but we recommend that you take some time to change them to your taste.
- Name: As stated in the Rules, it Is required that all characters have a believable name {restrictions can be different based on race, consult the relevant lore). You can randomize your character's name, based on gender. Generally your name should be coherent, include a Forename and a Surname, and not be a blatant joke or reference to a real life figure. I am looking at you everyone who wants to be called John Cena!
- Gender: Self-explanatory; this is purely for roleplay purposes, its either male or female.
- Age: The only cosmetic setting that is basically useless. It will only appear on in-game security and medical records and won't change your characters appearance.
- Species: You can set your species to things like human (which is the default) to others like Tajaran, Vulpkanin, Unathi and more. Although we all know the best race is Tajaran.
- Secondary Language: You will always have the language "Sol Common" which is essentially the stations English. However you can choose a second language like "Tradeband". If you choose a different species they will also have the species language.
- Blood type: Doesn't really effect anything, most people set it to O+
- Disabilities: Quite self explanatory, here you can choose different disabilities.
- Nanotrasen Relation: What is your characters relationship with the god cooperation Nanotrasen?
- Appearance Options: Change the colour of your characters hair, skin etc.
Occupations
This is quite an important option as it will allow you to change which jobs you like to play in the round. While this won't take effect after the round has started you can set preferences for jobs to be at the start of the round.
Flavour Text
Flavour text is like your description, it will be seen when people examine you in game. Try to keep it short and snappy, a paragraph at most.
Character Recirds
This will pop-up a window that will allow you to set your character Medical and Security records, and have them be able to be read in-game by Medical Doctors or Security Officers respectively.
This is mostly a fun little RP tool that can be used to help flesh out your character more. However, since it appears in-game as an official record, it should be written as such. Try to write it as you would expect from a large company like NanoTrasen.
Do not put your records in your Flavor Text. Flavor Text is meant for your physical description
There is also the "Employment Records" which can show your character's past occupation history.
Game Preferences (antagonists)
In this section you can choose to turn on and off preferences to be antagonists in the round, turning these on does not guarantee you will be an antagonist you are simply saying you would like to be one. However, as a new player you are not eligible to play as an antagonist until you have a few days on record.
The non antagonist roles listed here are:
-PAI: A Personal AI device. With this enabled, you will be able to become a Personal AI when observing the round or after death. This will never happen without you confirming it at the time, so you should leave this option on.
-Sentient Animal: This will enable you to rejoin the round as a sentient animal when dead or observing, provided Xenobiology create them.
-Positronic Brain: When dead or observing, this option will make you eligible to become a positronic brain- as with becoming a pAI, you will also have to opt-in at the time. A positronic brain can be used to create a Cyborg or Artificial Intelligence.
Saving your character
Clicking the "save slot" button will save your character to the database along with your occupation preferences and your antagonist choices.
Occupations revisited

Your occupation is by far the most important thing you will choose on the server. It affects your station access, rank, authority, equiptment, and purpose in life. These range from civilian jobs such as Chefs or Janitors, all the way up to Head of Security or the Captain.
Job Assignment
With the exception of Assistant, all job preferences have four levels: Never, Low, Medium, and High. These change how likely the server is to assign you that job when it compares your preferences with those of the other players. You may only select a single job on 'High', but there are no limits otherwise.
Because of the diversity and range of jobs available, there are many ways to play the game. A lot of these jobs, however, require a good knowledge of the game mechanics, the layout of the station, and how to use in-game tools and machinery. Because of this, the following jobs are recommended for new players:
- Civilian: The most basic of all occupations, the civilian and its variants has no authority and, generally speaking, no responsibilities. It's an excellent opportunity to learn the game mechanics — but your access is limited, so feel free to ask other people if you can help, and they'll usually be happy to show you around their department and help you learn the ropes. It also lets you practice roleplaying, if you're still unsure about it.
- Cargo Technician A basic, yet practical job that is easy to pick up and will help you learn the majority of the game's controls. Working under the Quartermaster, you're tasked with ordering supplies and delivering them to the relevant department, to ensure the station is well-equipped.
- Quartermaster Similar to the cargo technician, yet they are in charge of the cargo technicians and the shaft miners. Requires very little knowledge and is a great job to get the hang of some command to start off with.
- Janitor: A simple, if menial, job that involves replacing lightbulbs, cleaning up messes, putting out wet floor signs, and then pointing them out to people who've slipped on the floor you just finished mopping. Your only responsibilities are to keep the station clean and well-lit, and it'll help you learn your way around the station and its various departments.
- Chef: A fairly simple job that gives you a good introduction to mixing ingredients, and there's even the possibility of cake into the bargain. Recipes are available here, to help kickstart a budding Chef's career.
- Bartender: Like the Chef, but with more alcohol. The Barman's job is primarily mixing and serving drinks to a thirsty crew. The recipes are also available here. You'd be surprised at some of the stuff you can make, so try it out!
If you're interested in other jobs, feel free to browse the Job guides. Try to avoid any Security, Engineering, or Command positions until you get a hang of the game. (Jumping into a position you're not prepared to do is a guaranteed way of making people angry at you, and possibly earning a jobban.)
Playing the game
Congratulations you have made it this far, you now have a character, a job and I am sure you're ready to jump straight into your new role! Well hold your horses cause we got a bit more talking to do.
Starting the round

Each round begins with a short period where people can chat and declare themselves ready for the round, this where your job preferences come in!
However, more often then not you will join half way through a round. By clicking join you can see a list of jobs currently available to the server, they might not be the best jobs but they are still jobs. You can also click "view crew manifest" to see who is onboard the station. When you spawn onto the map you will start in the arrivals shuttle, and will be introduced by the Arrivals Announcement Computer or the AI. From their you can either head over to your workplace and get started or explore a bit first. There is a page on the map if you would like to have a map of the station. Please be aware it is highly outdated.
Gameplay
The User Interface

This is a general guide to the game interface; note that it won't be accurate to all UI styles, nor are all the elements shown in the image at right.
- 1. Clothing: Anything your character is wearing. Clicking the backpack icon on the bottom left will hide this menu.
- 2. Hands: The items you're holding in your hands. The hand you're currently using will be highlighted, and you can switch hands by clicking the appropriate hand or clicking 'Swap'. (Keyboard shortcut: Page-Up)
- 3. Pockets: Your jumpsuit has pockets, and anything in them is displayed here. You won't be able to use them if you're naked.
- 4. Actions:
- Throw: Toggle throwing; you can then throw the item in your active hand by clicking something to throw it at. (Keyboard shortcut: End)
- Drop: Immediately let go of the item you're holding. (Keyboard shortcut: Home)
- Resist: If you are buckled, cuffed, or trapped in a locker, clicking this button activates the process of getting out.
- Let go: This button appears if you are pulling an object or a mob(ctrl+click). (Not shown)
- Movement Speed: This will toggle whether you run or walk. Walking is slower but safer, and you won't slip as easily.
- 5. Intent: This selects how you will interact with an object or a person when you make an action. Blue is Disarm, green is Help, yellow is Grab, and red is Harm.
- 6. Body Target: Shows which part of the body you will interact with, whether helping or harming. To change this, click on the different parts of the body.
- 7. Weapon Mode: When you use a ranged weapon, this determines whether you shoot where you click, or take targets captive and fire automatically if they make a move.
- 8. Status Icons: In the new, lighter UI styles, most of these are only visible if something's out-of-the-ordinary.
 Heat Warning: Appears if the air you're breathing is superheated. Usually shows up near fires.
 Oxygen Warning: Appears if the air you're breathing has too little oxygen. If you linger too long, you'll eventually pass out and slowly asphyxiate.
 Pressure Warning: Appears if air pressure is too high or too low.
 Internals: Shows whether you are running on internals (an oxygen tank and breath mask). If you have them equipped, clicking this will switch them on or off.
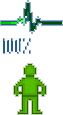 Health: Fades to red as you take more damage. If it flashes with the word CRIT, it means you are close to death and require immediate medical attention. If your character is in serious pain, your indicator will make you appear more injured than you are.
 Temperature Warning: Appears if your surroundings are too hot or too cold.
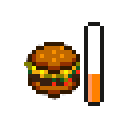 Hunger: Appears and gradually fades to red as you get hungrier. (It'll take a while to disappear after you eat something, though.)
- 9. ID card slot: This is where your ID card goes.
- 10. Belt slot: This is where items that can be put on belts(e.g camera) or belts(e.g toolbelt) go.
- 11. Back slot: This is where your satchel, backpack, or in some cases a large weapon go.
- 12. PDA slot: You put your PDA here.

